How to create a PageTemplate
- 100%
- 6.0
- Enterprise
- Community
Planned
Overview
Sense/Net ECMS has a highly customizable content rendering system. Page templates are html templates for pages. A page template contains the zones where the content and portlets appear. Here you can define the css and javascript files that you want to use on a page. Every portlet page (or application page) must have a page template so they are the most important basic part of the system which allows you to customize your portal easily.
Steps
In this section I will show you how to make a Page Template to display a simple page step-by-step. It is helpful to use some html editor software to complete this tutorial, but you can use a simple notepad or the editor in Content Explorer also.
1. Create html
Create a simple html file with a head and a body section
<!DOCTYPE html PUBLIC "-//W3C//DTD XHTML 1.0 Transitional//EN" "http://www.w3.org/TR/xhtml1/DTD/xhtml1-transitional.dtd">
<html xmlns="http://www.w3.org/1999/xhtml" >
 <head>
  <title></title>
 </head>
 <body>

 </body>
</html>
2. Use localization features
If you want to use the localization features of Sense/Net ECMS please copy this row to your htmls first row
<% String snLang = SenseNet.Portal.Virtualization.PortalContext.Current.Site.Language; %>and copy this to the beginning of the body section.
3. Modify head section
Set meta tags, favicon, etc. in the header section
It is possible to create a dynamic title:
<title><% = (SenseNet.Portal.Virtualization.PortalContext.Current.Workspace != null) ? SenseNet.Portal.Virtualization.PortalContext.Current.Workspace.DisplayName :"Sense/Net" %></title>4. Css and javascript files
Refer to the css and js files at the beginning of the body section:
<sn:CssRequest CSSPath="$skin/styles/example/example.css" ID="pageTemplateStyleReq" runat="server" />For more info, read adding css references to pages and adding js references to pages.
5. Create zones
Add html elements (divs) in the body section to build the page structure.
<div class=”container”>
 <div class=”header”></div>
 <div class=”content”>
  <div class=”left_column”></div>
  <div class=”right_column”></div>
 </div>
 <div class=”footer”></div>
</div>
If you have to put some static things to the pagetemplate:
<div class=”container”>
 <div class=”header”>
  <a href=”/”><img src=”example_logo.png” /></a>
 </div>
 <div class=”content”>
  <div class=”left_column”></div>
  <div class=”right_column”></div>
 </div>
 <div class=”footer”></div>
</div>
Create zones that will contain portlets:
<div class=”container”>
 <div class=”header”>
  <a href=”/”><img src=”example_logo.png” /></a>
 </div>
 <div class=”content”>
  <div class=”left_column”>
   <snpe-zone name="LeftCol" HeaderText="Left Column" PartChromeType="TitleAndBorder"/>
  </div>
  <div class=”right_column”>
   <snpe-zone name="RightCol" HeaderText="Right Column" PartChromeType="TitleAndBorder"/>
  </div>
 </div>
 <div class=”footer”></div>
</div>
Please note that each zone requires a unique name
6. Add portlets
If you want to put a portlet in a zone or in a simple html element that will be displayed on every page created with this page template:
<div class=”container”>
 <div class=”header”>
  <a href=”/”><img src=”example_logo.png” /></a>
 </div>
 <div class=”content”>
  <snpe:BreadCrumbPortlet BindTarget="CurrentContent" ID="BreadCrumb" runat="server" Separator=" / " ShowSite="True" SiteDisplayName="Home" />
  <div class=”left_column”>
   <snpe-zone name="LeftCol" HeaderText="Left Column" PartChromeType="TitleAndBorder">
    <snpe:advancedloginportlet title="Login" id="login" runat="server" loginviewpath="/Root/System/SystemPlugins/Portlets/AdvancedLogin/AdvancedLoginView.ascx" cssclass="sn-advancedLogin" />
   </snpe-zone>
  </div>
  <div class=”right_column”>
   <snpe-zone name="RightCol" HeaderText="Right Column" PartChromeType="TitleAndBorder"/>
  </div>
 </div>
 <div class=”footer”></div>
</div>
You can find the list of portlets here.
7. Save the page template
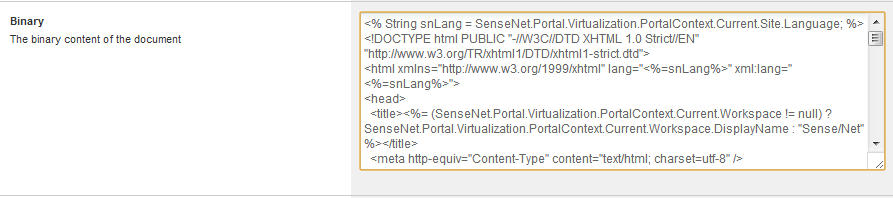
Go to the /Root/Global/pagetemplates folder in Content Explorer, click on ‘New’ and choose Page Template. Copy your html, paste it to the binary field and save it.

8. Use the page template
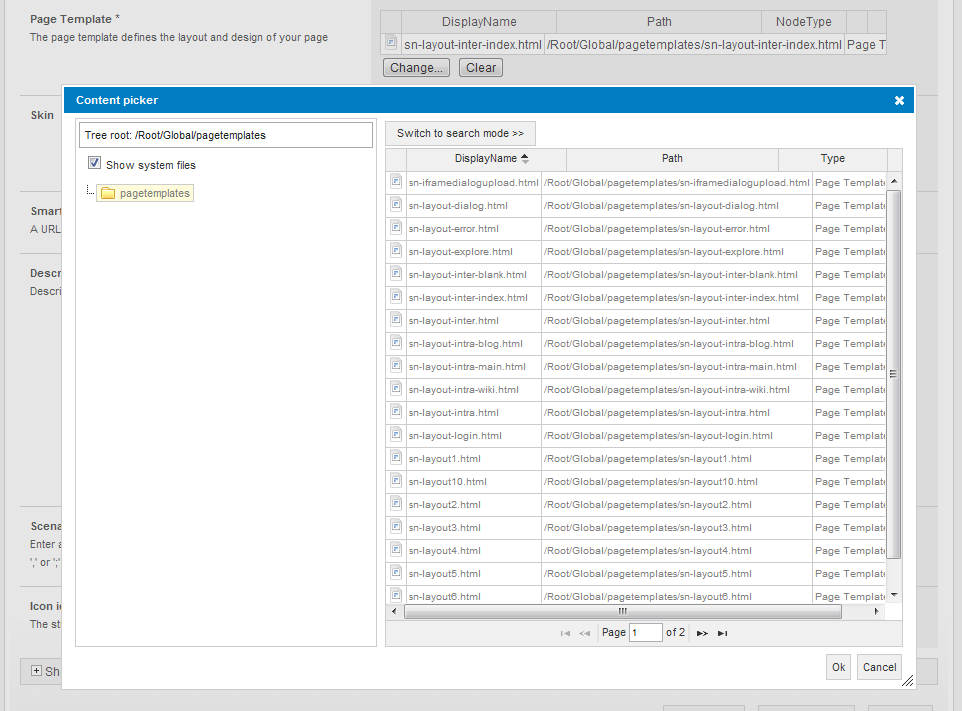
Pick the pagetemplate in the 'Page template' field of the page in edit view
9. Modify page template
You can copy and paste your modified html code or edit the html with the editor in the Content Explorer.
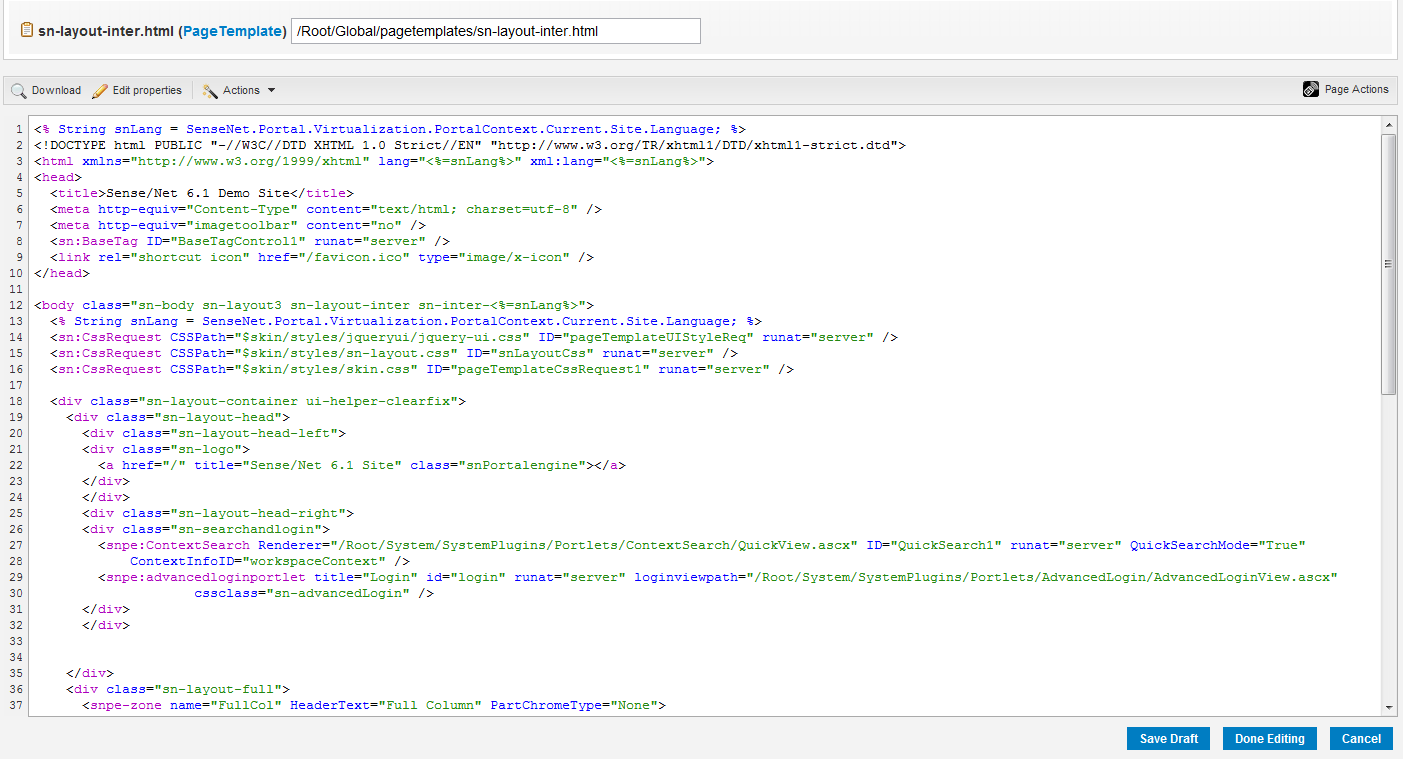
If you modify a page template all the pages that use this page template will be refreshed
Related links
- Page Template
- Skin System overview
- The Skin System - for Portal builders
- The Skin System - for End users
- The Skin System - for Developers
- Skin anatomy
- The Sense/Net CSS Framework
- Localization
- Bundling css and js files
References
There are no external references for this article.
